Dolphin Setup{anty}
30 Sep 2025
Reading time ~ 4 mins
Downloading and Installing Dolphin{anty}
- Open the official Dolphin{anty} website in your browser.

- Click “Download”.

- Run the installer and follow the on-screen instructions. MacOS may ask for permission to install. MacOS may ask for permission to install. After installation, open the Dolphin authorization window.{anty}
Registering an Account in Dolphin{anty}
- In the login window, click Login/Register.
- If you already have an account, enter your email and password.

- If you don’t have an account, register via email, fill in all fields, and confirm your email.

- You can set up two-factor authentication right away or skip this step and do it later.

- Return to the application, log in with your username and password, and you can start with a free plan to get familiar.

Creating the First Profile in Dolphin{anty}
- In Dolphin{anty}, click “Create Profile”

- Enter a profile name (for example, Prosox test).
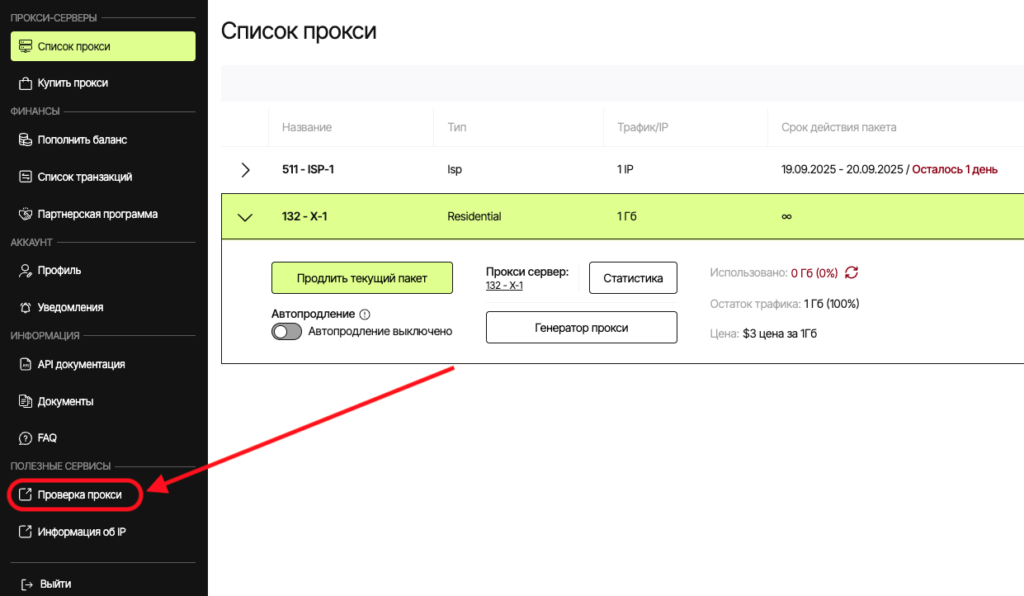
Preparing Proxy Data in Prosox
- Log into your Prosox account. If you don’t have an account yet, you can create one by confirming your email.
- Go to the “Proxy List” page if you already have proxies, or buy proxies if you haven’t done so yet.
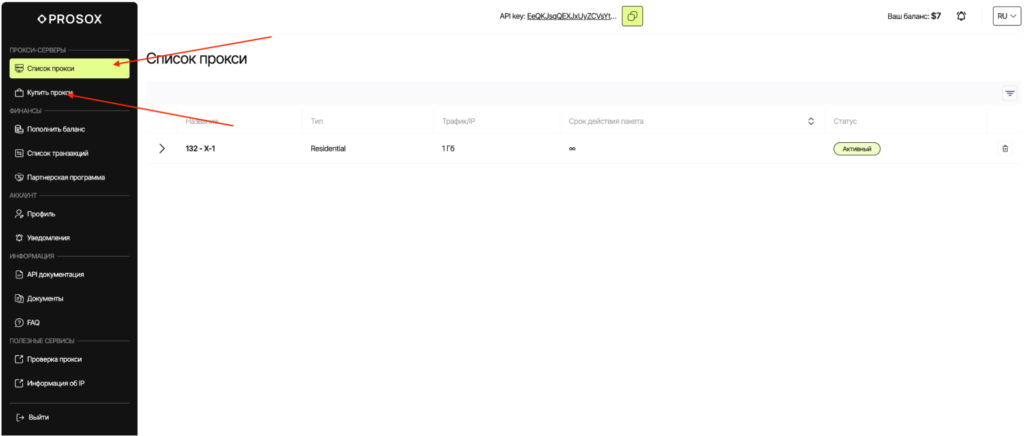
- Choose the proxy type:
- Residential (rotational) – for “picky” sites, parsing, advertising. IPs can change.
- ISP (static) – the same stable IP for long sessions, accounts, payments.
- Copy the connection parameters.
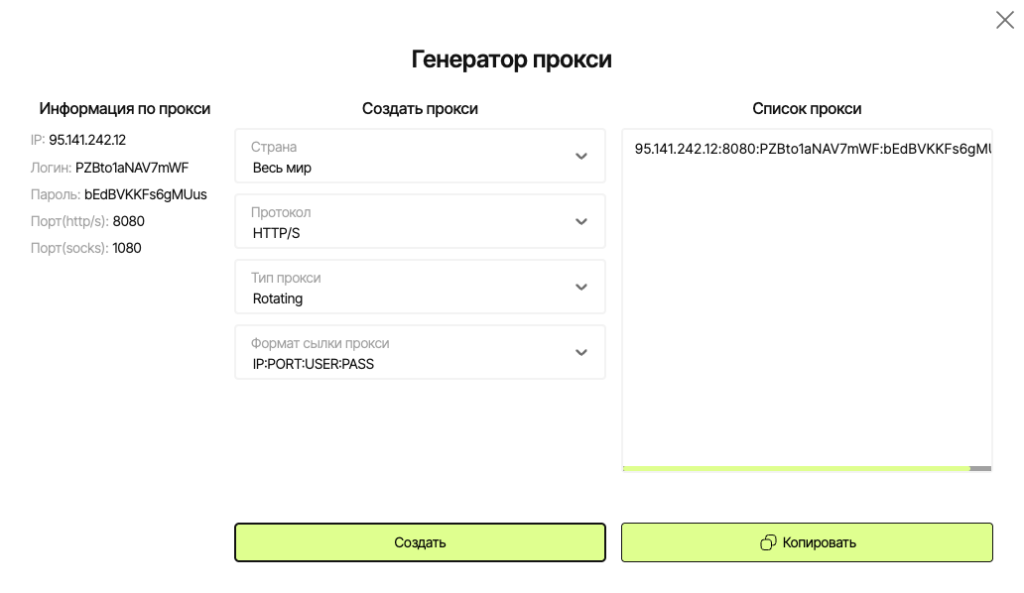
Connecting Prosox RESIDENTIAL Proxies
Example: You purchased residential proxy servers from Prosox.io and received the following:
95.141.242.12:8080:PZBto1aNAV7mWF:bEdBVKKFs6gMUus
- Go to the advanced settings tab to fill in the fields:
- In the proxy type field, select HTTPS or SOCKS5 (whichever is specified in your Prosox).
- Paste the received proxy: 95.141.242.12:8080:PZBto1aNAV7mWF:bEdBVKKFs6gMUus
- In the proxy type field, select HTTPS or SOCKS5 (whichever is specified in your Prosox).
2. Proxy check.

Proxy server verification is already implemented in the Prosox.io personal account. You can check the correct operation from your personal account.
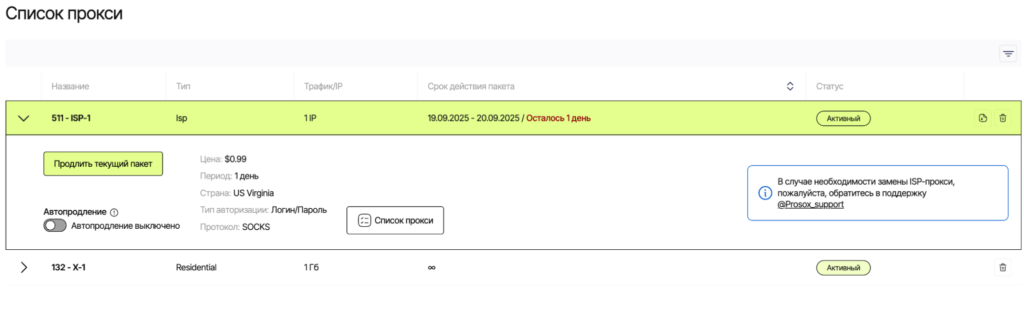
Connecting Prosox ISP (STATIC) Proxies
Example: You purchased USA proxy servers from Prosox.io and received the following:
62.171.230.139:63060:prosoxPbfyz:9fSbyM7ce8RW
Go to the advanced settings tab to fill in the fields:
- In the proxy type field, select HTTPS or SOCKS5 (whichever is specified in your Prosox).
- Paste the received proxy
Proxy check.
Why ISP proxy: you get the same IP every time you run. This is ideal for long sessions: accounts, billing, payments, careful account management without IP “chatter”.
Setting up “Fingerprints” (to Reduce Blockages)

Make the profile as similar as possible to a regular user’s computer:
- WebRTC:
Choose Altered mode – it substitutes the WebRTC-IP from your proxy.
Manual – use only with static IP when you set the address manually (via API/specific parameters).
Don’t enable Off and Real. - Canvas:
Noise — enable for mass tasks: uploads, pushes, CPA, TikTok.
Real — leave for manual work, farming, and managing “long-living” accounts. - WebGL:
Noise – makes the fingerprint unique but looks natural. - WebGL Info:
Real, so that the graphics card characteristics match the environment. If you know the configuration exactly (for example, working on one type of device), you can set it to Manual.
This set of settings ensures natural rendering and doesn’t raise unnecessary suspicions - ClientRects
If you’re working from the same device and farming manually – choose Real.
Noise, if the profile will be opened on different machines or used by a team. - Time zone: set to auto.
- Geolocation: auto.
- System language: auto.
- It’s better to leave other settings as default.
What not to do:
- One proxy – one profile. Sharing IP between profiles = quick ban.
- Don’t change Canvas/WebGL between profiles. Such changes leave connecting traces.
- Keep Timezone, Language, and User-Agent consistent. Inconsistencies are an anti-fraud trigger.
- Don’t reuse IPs. Especially on Facebook – ban is almost instant.
In the end, with these settings, your profile will look like a separate user – with its unique IP, device, language, and behavior pattern.

Pricing Plans
The pricing plan can be selected depending on the needs and number of required profiles:
- Free plan: ability to work with 10 profiles for free at the start to check the quality of the service.
- Paid plans: from $10 per month, discounts when purchasing a plan for 6 and 12 months.

Conclusion
Dolphin{anty} is a powerful and convenient tool for secure work with multiple accounts. Regardless of your role – arbitrage specialist, seller, trader, or any user with multiple profiles – you get the necessary level of anonymity, flexible fingerprint control, and a stable environment for effective, predictable work.
- Retriv.Market – A marketplace for accounts with one-click purchasing.
- The Best Anti-Detection Browser is BitBrowser for Multi-Accounting.
- NoCaptchaAI | The Fastest & Most Affordable AI-Powered Captcha Solver
- Dolphin Anty — an anti-detect browser for multiple accounts
- XLogin setup
- ixBrowser setup
- VMLogin setup
- MULogin setup
- GeeLark Setup
- How to set up a proxy in Google Chrome browser

Would you like to receive a personalized offer?
If you need technical advice or have a specific request, please contact us.