MULogin setup
16 Feb 2026
Reading time ~ 4 mins
Download and install MuLogin
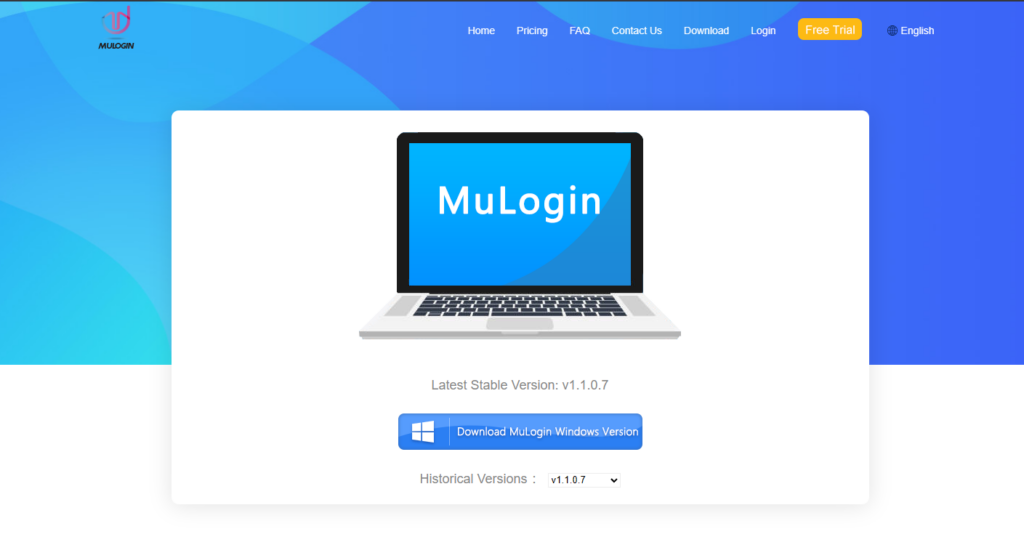
- Open the official MuLogin website in your browser. A free trial period is available.
- Click Download (select your operating system: Windows or macOS).

- Run the installer and follow the on-screen instructions. MacOS may ask for permission to install. After installation, the MuLogin authorization window will open.
Register an account with MuLogin
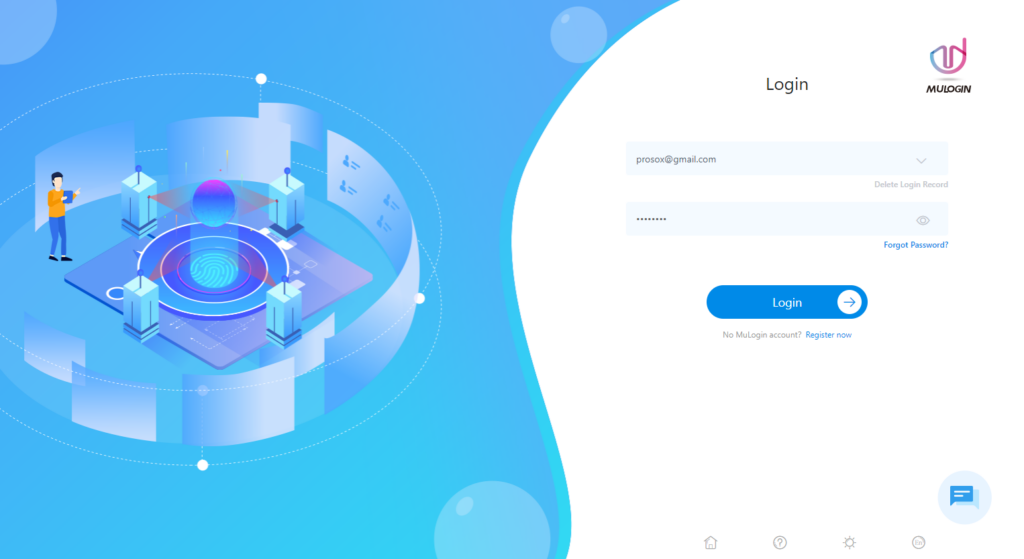
- Click Sign In/Register in the login window.

- If you already have an account, enter your email and password.
- If you don’t have an account, register via email, fill in all the fields, and confirm your email address.
You can also register using third-party service accounts if this option is available in the current version. - Return to the application and log in with your login and password.
Creating your first profile in MuLogin
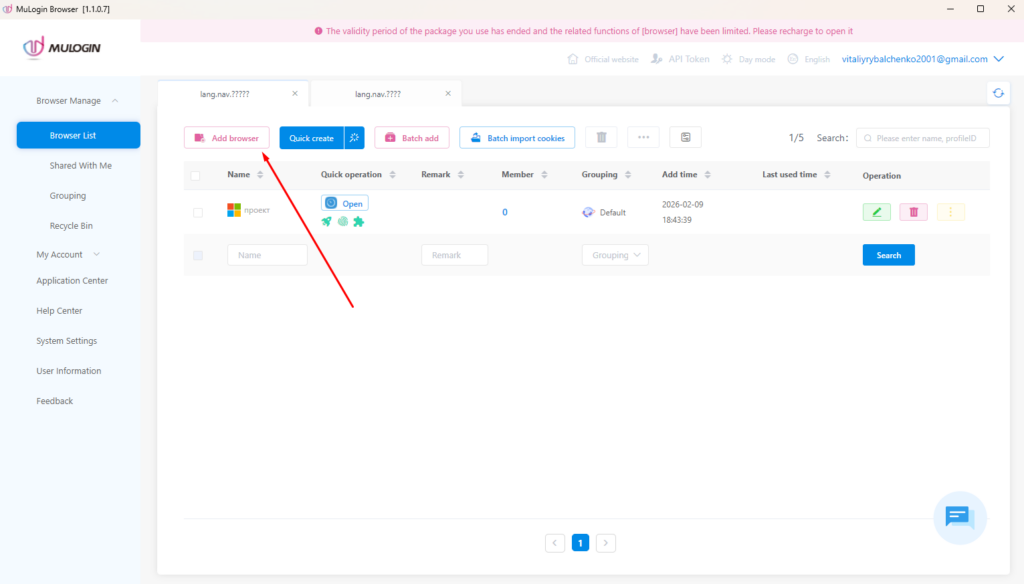
- In MuLogin, open the Browser Profile section.
- To create a new profile, click “Add browser.”

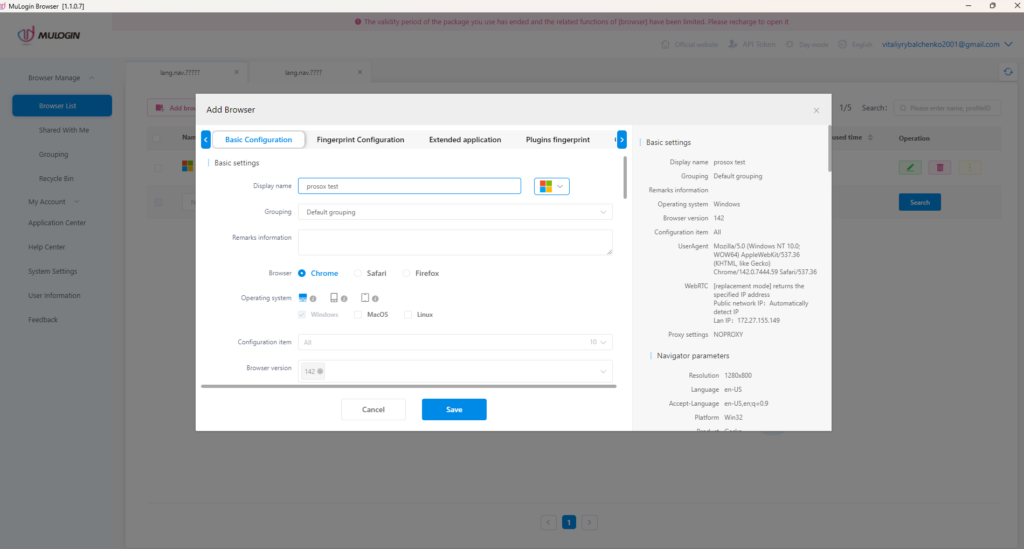
- Enter a profile name (for example, Prosox test).
- Select the browser engine/core: Chrome or Firefox (leave it as default if you are not sure).
- OS: specify the environment — macOS or Windows.
- User-Agent: leave auto-selection in Mulogin for optimal masking.

- Go to the Proxy section (or the “Proxy Settings” tab).
Important: each profile = one proxy. This is safer.
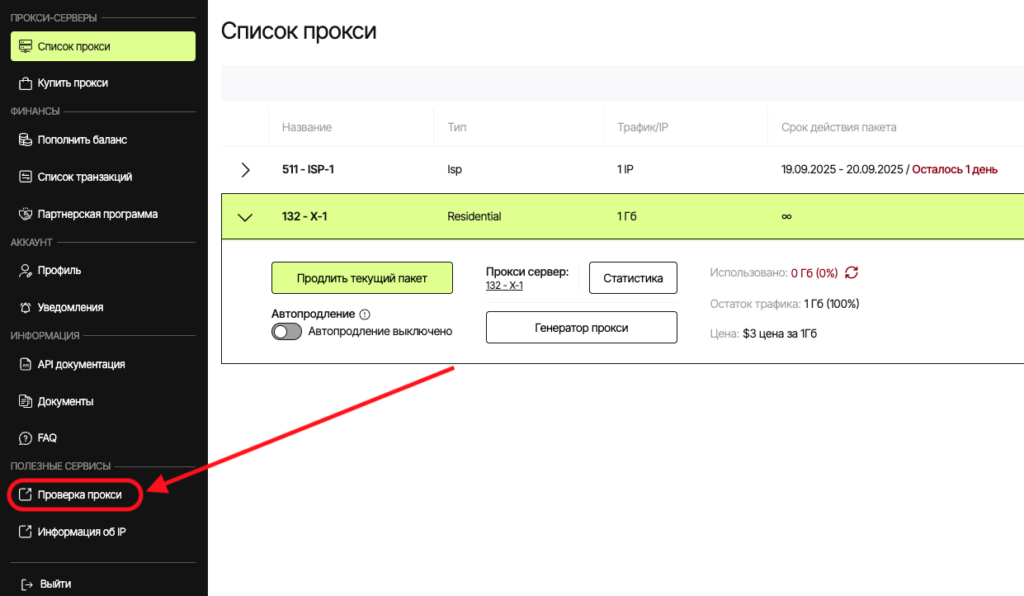
Preparing proxy data in Prosox
- Log in to your Prosox account. If you don’t have an it yet, create one by confirming your email.

- Go to the “Proxy List” page if you already have proxies, or buy proxies if you haven’t done so yet.

- Select plan/proxy type:

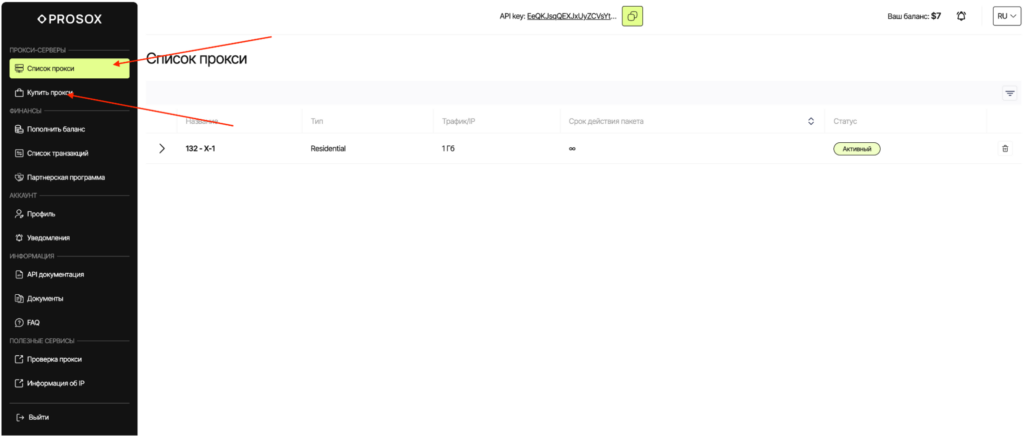
- Residential (rotational) – for “picky” sites, parsing, advertising. IPs can change.

- ISP (static) – the same stable IP for long sessions, accounts, payments.


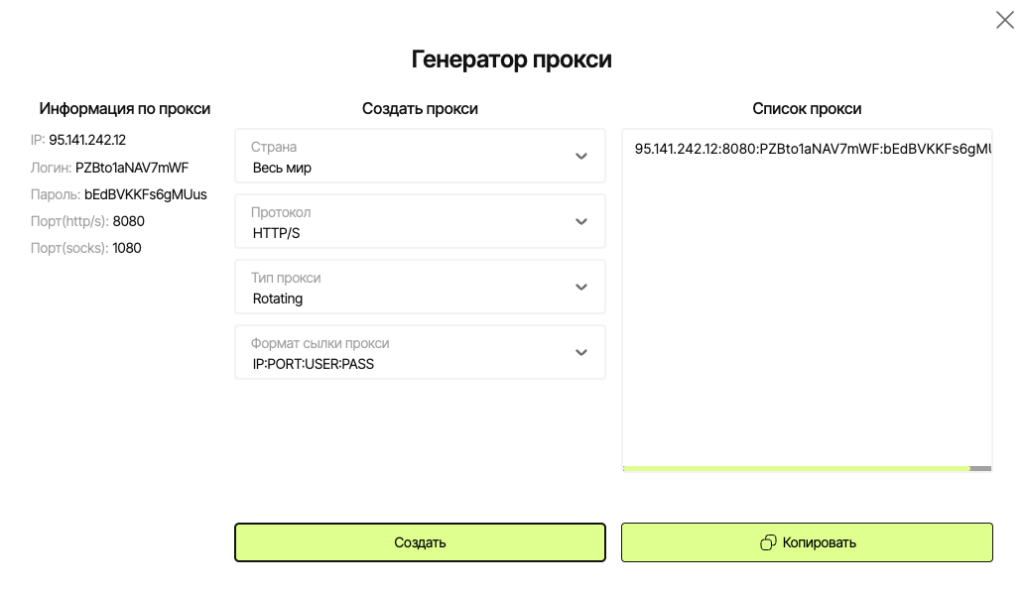
4. Copy the connection parameters.
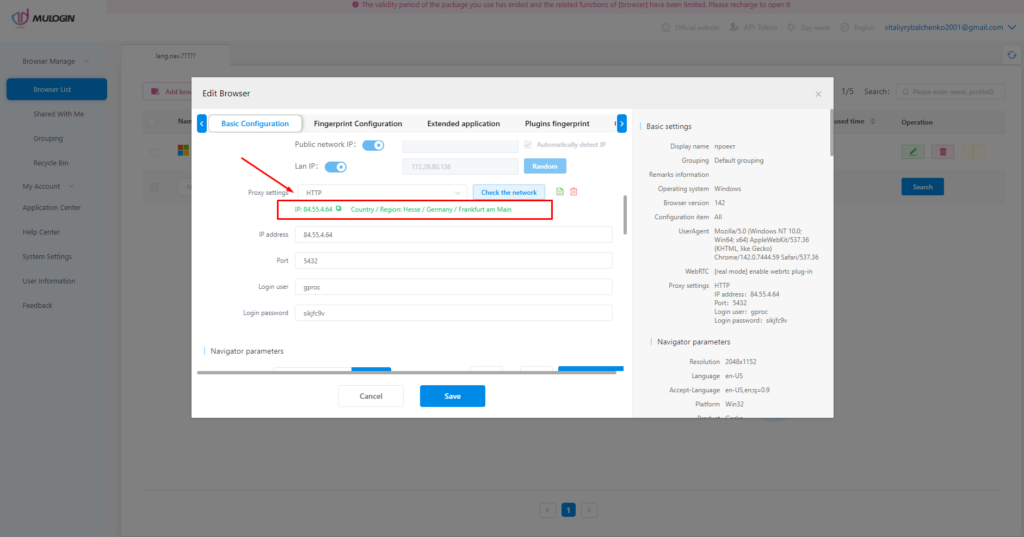
Connecting Prosox RESIDENTIAL Proxies
Example: You purchased unlimited residential proxy servers from Prosox.io and received the following:
0Wva7syVx7Qh:sikjfc9v@84.55.4.64:5432
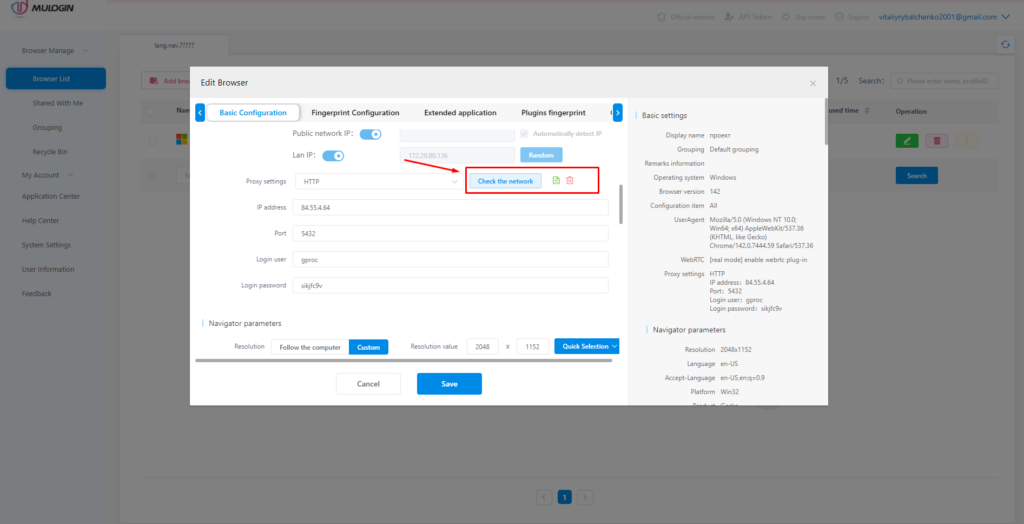
- Fill in the fields:
- In the proxy type field, select HTTPS or SOCKS5 (whichever is specified in your Prosox).
- Host: enter your HOST from Prosox (example: 84.55.4.64)
- Port: 5432
- Login: 0Wva7syVx7Qh
- Password: sikjfc9v
- Proxy check.
- Click check proxy.

- Green status — everything is ok, let’s move on.
- Red — double-check the data.
Proxy server verification is already implemented in the Prosox.io personal account. You can check the correct operation from your personal account.
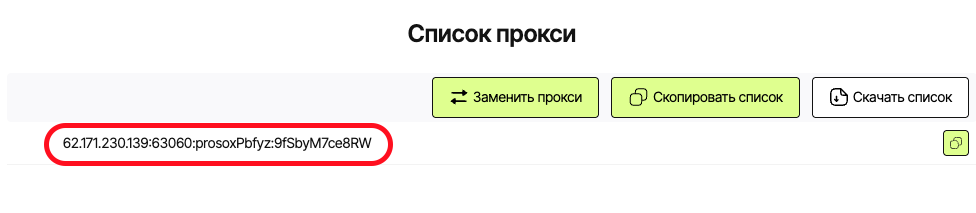
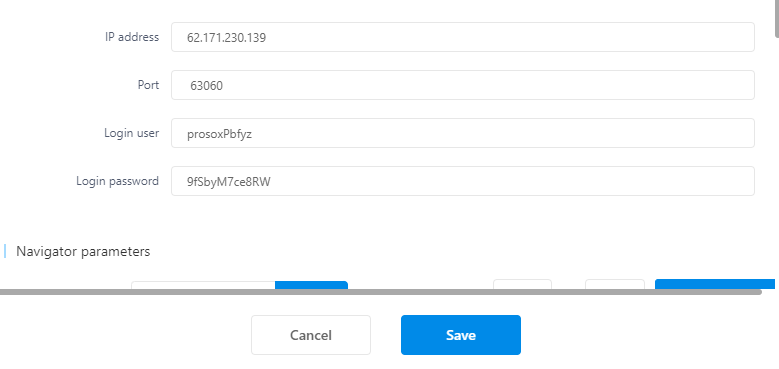
Connecting Prosox ISP (STATIC) Proxies
Example: You purchased USA proxy servers from Prosox.io and received the following:
62.171.230.139:63060:prosoxPbfyz:9fSbyM7ce8RW
- In the proxy type field, select HTTPS or SOCKS5 (whichever is specified in your Prosox).
- Host: paste your HOST from Prosox (62.171.230.139)
- Port: 63060
- Login: prosoxPbfyz
- Password: 9fSbyM7ce8RW
- Click Check proxy.
- Click Save Profile.
Why ISP proxy: you get the same IP every time you run. This is ideal for long sessions: accounts, billing, payments, careful account management without IP “chatter”.
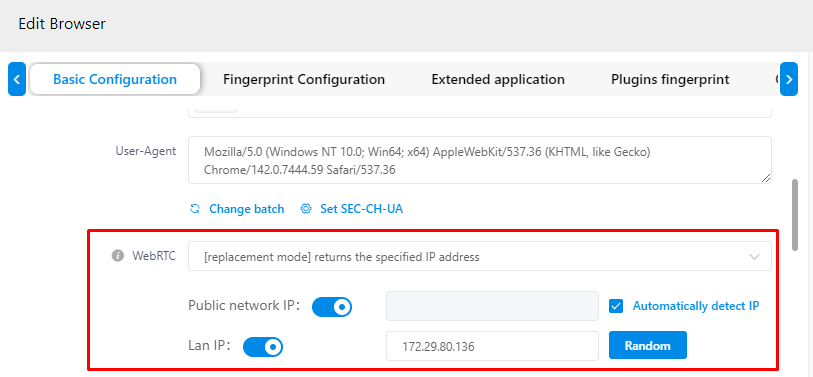
Setting up “Fingerprints” (to Reduce Blockages)
Make the profile as similar as possible to a regular user’s computer:
- WebRTC: turn it off so as not to “expose” the real IP.
- Time zone: set it automatically by IP to avoid inconsistencies.
- Geolocation: synchronize with the IP address.
- System language: select the language that corresponds to the IP country/city.
- Application/browser language: the same as the language by IP.
- Screen resolution: use typical presets — this looks more natural.
- Fonts: leave the standard sets to avoid standing out.
- Hardware “noise”: enable all simulation options — this brings the behavior closer to a real device.
- WebGL (metadata): specify common manufacturer/renderer values (for example, “Google Inc.”, “Apple”).
- WebGPU: configure according to WebGL parameters
In the end, with these settings, your profile will look like a separate user – with its unique IP, device, language, and behavior pattern.

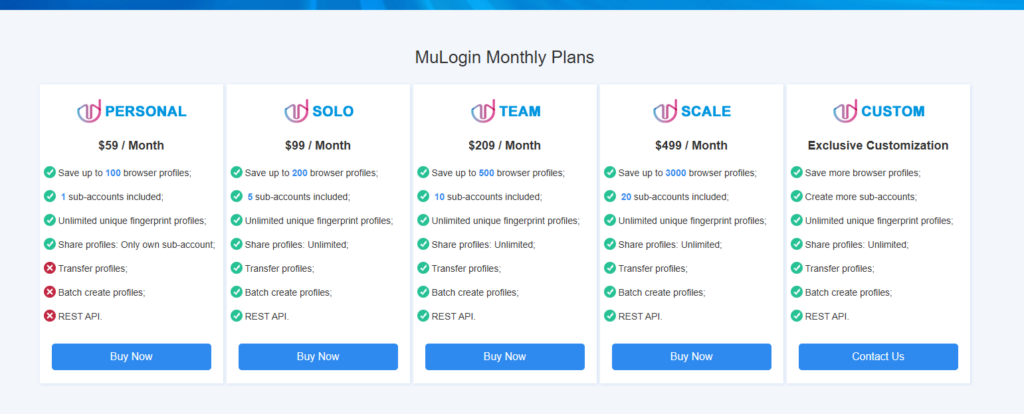
Pricing Plans
You can choose a pricing plan in MuLogin depending on your needs and the number of profiles required:
- Basic plans start at around $59 per month for ~100 profiles and one subaccount.
- More advanced plans offer hundreds and thousands of profiles, more jobs, and extended limits.
Conclusion
MuLogin is a reliable tool for secure and convenient management of multiple accounts. Whether you are an arbitrageur, seller, trader, or someone who needs to maintain multiple online profiles, MuLogin, in conjunction with Prosox proxies, provides the anonymity and control necessary for stable, secure, and efficient work.
- Retriv.Market – A marketplace for accounts with one-click purchasing.
- The Best Anti-Detection Browser is BitBrowser for Multi-Accounting.
- NoCaptchaAI | The Fastest & Most Affordable AI-Powered Captcha Solver
- Dolphin Anty — an anti-detect browser for multiple accounts
- XLogin setup
- ixBrowser setup
- VMLogin setup
- GeeLark Setup
- How to set up a proxy in Google Chrome browser
- How to set up a proxy in the Opera GX browser

Would you like to receive a personalized offer?
If you need technical advice or have a specific request, please contact us.